
To regas a car aircon, a licensed technician recovers any remaining refrigerant, vacuum-tests the system to remove air and moisture (and to help detect leaks), then refills it with the correct refrigerant type and exact measured weight for your vehicle, followed by pressure and temperature testing to confirm it is cooling properly. If the system will not hold vacuum or fails leak checks, it should be repaired before regassing, otherwise the new gas will escape again.
If your air conditioning is blowing warm air, taking ages to cool down, or just not coping in summer, chances are it needs attention. This guide explains the process step-by-step, when regassing is actually the right fix, and when it is not.
We will also cover how long it takes, how much it costs, and the warning signs to watch for.
How to Tell If Your Car Aircon Needs Regassing
Not every aircon problem is caused by low refrigerant. That said, there are clear signs that often point to regassing being needed.
Common symptoms include:
- Air coming from the vents is cool at first but quickly turns warm
- Aircon takes much longer than normal to cool the cabin
- Cooling is inconsistent while driving
- The system works better at highway speeds than in traffic
- You have not had the aircon serviced in several years
For a more detailed breakdown, see this guide on how to tell if your car aircon needs regassing.
Example
If your aircon feels icy cold in winter but struggles badly in summer, that is a classic sign of low refrigerant rather than a failed component.
When Regassing Will NOT Fix the Problem
This is important. Regassing is not a cure-all.
Regassing will not fix:
- A leaking hose or seal
- A failed compressor
- A blocked condenser
- Electrical faults in the aircon system
- A faulty pressure sensor
If refrigerant has leaked out quickly, regassing without fixing the leak is a waste of money. The system will lose gas again.
If your aircon is not cold at all, makes loud noises, or refuses to engage, read why your car air conditioner is not getting cold before assuming a regas will solve it.
Tools Needed to Regas a Car Aircon System
Regassing a car aircon is not a basic mechanical job. It requires specialist equipment, proper licensing, and an understanding of how automotive air conditioning systems behave under pressure. Below are the core tools required to do the job correctly and legally in Australia.
Tool |
What it does |
Why it matters |
|---|---|---|
| Refrigerant Recovery and Recharging Machine |
|
Without this machine, you cannot accurately recover, vacuum, or recharge the system. Topping up without recovery leads to incorrect charge levels and poor cooling. |
| Manifold Gauge Set (High and Low Side) |
|
Pressure readings help diagnose issues like restrictions, overcharging, undercharging, or compressor problems. |
| Vacuum Pump |
|
Moisture inside the system can freeze, block refrigerant flow, cause corrosion, and reduce cooling performance. |
| Refrigerant (Correct Type and Specification) |
|
Using the wrong refrigerant or the wrong amount can damage seals, reduce efficiency, and shorten component life. |
| Refrigerant Oil and Oil Injector |
|
Too little oil can damage the compressor. Too much oil reduces cooling efficiency. |
| Leak Detection Equipment |
|
Regassing a leaking system without finding the leak is a short-term fix at best. |
| Digital Thermometer or Temperature Probe |
|
Vent temperature confirms whether the regas actually improved system performance. |
| Safety Equipment |
|
Direct contact with refrigerant can cause frostbite or serious eye injury. |
| Licensing and Certification (Essential) |
|
Legal requirement, protects the environment, and ensures the system is serviced correctly and safely. |
Step-by-Step: How to Regas Car AC Systems
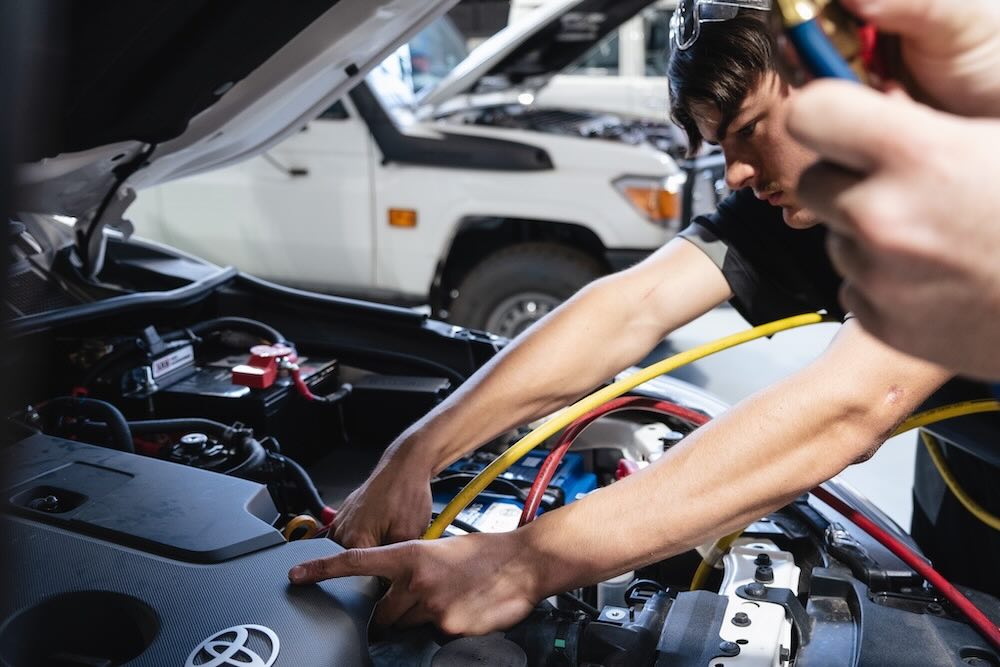
Important note: Only a licensed automotive air conditioning technician can legally regas a car aircon system in Australia, as refrigerants must be handled using approved equipment by technicians certified to work with automotive A/C gases.
1) Confirm the Complaint and Check the Basics (Before Touching Refrigerant)
A proper regas starts with proving what the car is doing, not guessing.
What a technician will do:
- Ask symptoms and history
- When did it start blowing warm?
- Does it cool better at highway speeds than in traffic?
- Any recent crash, front-end repair, radiator work, or electrical work?
- Has it been regassed before, and how long did it last?
- Set the test conditions
- Engine at operating temp.
- Cabin fan on medium-high.
- Aircon set to cold, recirculation on.
- Doors and windows closed.
- Measure vent temperature
- A probe thermometer goes in the centre vent.
- The tech records the stabilised temp at idle and again at about 1,500–2,000 rpm.
- Confirm compressor command and clutch operation (where applicable)
- Many modern cars do not use a traditional clutch, so the tech checks the compressor control signals and duty cycle instead.
- Check condenser airflow
- Condenser fan operation (especially important at idle).
- Obvious blockages like leaves, mud, bent fins.
- Quick electrical sanity check
- Fuses and relays for aircon system and fans.
- Any obvious sensor faults that would prevent compressor engagement.
Why this matters: If the condenser fan is dead, regassing will not fix poor cooling in traffic. If the system never commands the compressor on, regassing will not fix that either.
2) Identify the Refrigerant Type and Locate Service Information
Before any machine is connected, the tech confirms what refrigerant the vehicle uses.
What happens here:
- Check under-bonnet labels for refrigerant type (commonly R134a or R1234yf) and charge quantity in grams.
- If labels are missing or unclear, the tech may:
- Check manufacturer data.
- Use workshop software or service manuals.
- Confirm service port types and access
- High-side and low-side ports are identified.
- Some vehicles have tight access requiring removal of covers or intake ducting.
Why this matters: Using the wrong refrigerant or the wrong oil can damage seals, contaminate equipment, and cause future failures.
3) Initial Visual Leak Check (Fast but Valuable)
This is the “look for the obvious” stage.
A thorough check includes:
- Oily residue around fittings
- Refrigerant carries oil, so leaks often leave oily marks at joints.
- Hose condition
- Cracks, rub-through, swelling near crimps.
- Condenser inspection
- Stone damage, corrosion, impact marks.
- Compressor area
- Oil sling pattern, shaft seal area, case leaks.
- Service port caps and valves
- Missing caps can allow dirt in and slow leaks out.
- Cabin smell notes
- Musty smell points to evaporator/bacterial issues, not low gas.
Decision point: If there is clear physical damage (eg a smashed condenser), the right move is repair first, not a regas.
4) Connect Professional Manifold and Recovery Machine Correctly
This is where accuracy and safety matter.
Connection process (done carefully):
- Use the correct machine for the refrigerant type
- R134a and R1234yf require different handling and equipment setups.
- Purge service hoses
- Air is purged from hoses to avoid pushing air into the system.
- Connect low-side and high-side lines
- Low-side to the suction line service port.
- High-side to the discharge line service port.
- Confirm valves are closed/opened in the correct sequence
- Prevents sudden pressure spikes and equipment errors.
- Record static pressure
- With engine off, the tech notes the system’s resting pressure as a baseline.
Why this matters: Wrong connection order or poor hose purging can contaminate the system with air and moisture, which reduces cooling and can create corrosive acids.
5) Recover Existing Refrigerant (Do Not Vent)
A proper regas is not “top it up”. The system is recovered and measured.
What “recovery” involves:
- Machine extracts refrigerant into an internal tank
- No venting. This is safer and environmentally responsible.
- The machine measures how much came out
- The tech records recovered weight.
- Oil management
- Some machines record or manage oil removed during recovery.
- The tech notes this so oil can be balanced if required.
What the recovered amount tells you:
- If the car is meant to hold, for example, 500g and only 100g comes out, it strongly suggests a leak or long-term loss.
- If the amount is close to spec but cooling is poor, the issue may be airflow, condenser efficiency, blend door problems, or compressor performance.
6) Pull a Deep Vacuum to Remove Moisture and Test Sealing
This step is one of the biggest differences between a proper regas and a cheap one.
Vacuum stage in detail:
- Vacuum pump runs for a set time
- Long enough to boil off moisture inside the system.
- Target vacuum level
- The tech monitors vacuum depth (not just time).
- Vacuum hold test
- After pulling vacuum, the system is isolated.
- The tech watches whether vacuum holds steady.
- Interpreting results
- Holds vacuum well: good sign the system is sealed enough to proceed.
- Vacuum rises quickly: likely a leak that must be found and repaired before regassing.
- Vacuum rises slowly: could be a very small leak, or residual moisture outgassing. The tech may extend the vacuum time or proceed to more specific leak testing depending on readings and symptoms.
Why moisture is a big deal: Moisture can freeze at the expansion point, block flow, reduce cooling, and contribute to internal corrosion.
7) Leak Testing (When Vacuum Does Not Hold, or History Suggests a Leak)
If the system shows signs it will not hold pressure, the technician switches from regas to diagnostics.
Common professional leak testing methods:
- Nitrogen pressure test (dry nitrogen)
- System is pressurised to a safe specified level.
- Joints and components are checked for pressure drop over time.
- Soap solution can be applied to fittings and suspected areas.
- Electronic leak detector (“sniffer”)
- Used around joints, compressor seals, condenser, and evaporator drain area.
- UV dye (in some cases)
- Dye is added and the car is run.
- Later inspection with UV light reveals leak paths.
Important note: If the leak is in the evaporator inside the dash, diagnosis can be more involved. Regassing without addressing it usually means the gas disappears again.
8) Repair the Leak if Required (Then Repeat Vacuum Process)
If a leak is found, it must be repaired before the final regas.
Repair examples include:
- Replacing O-rings and sealing washers.
- Replacing a leaking hose or service valve core.
- Replacing a damaged condenser.
- Replacing a failed compressor seal or compressor assembly.
- Replacing a receiver-drier or accumulator if required by the repair procedure.
- Flushing parts of the system if there was a compressor failure (only in specific failure scenarios).
After repair:
- The system is vacuumed again.
- Vacuum hold is confirmed before adding refrigerant.
9) Recharge With the Exact Specified Refrigerant Weight (Not “By Pressure”)
This is where precision matters most.
How proper charging is done:
- Machine is set to the manufacturer-specified weight
- Example: 450g, 525g, etc (varies by vehicle).
- Refrigerant is injected as a measured charge
- The machine controls the amount accurately.
- Oil balancing if required
- If oil was removed during recovery or components were replaced, the correct type and amount of oil may be added.
- Add trace dye only if appropriate
- Only when it supports future diagnostics and is compatible with the system.
Why “by pressure” alone is wrong: System pressures change with ambient temperature, airflow, and engine speed. Weight is the correct standard.
10) Start-Up Checks and Live System Verification
Once charged, the tech confirms the system is operating correctly under real conditions.
A thorough verification includes:
- Compressor operation
- Smooth engagement (or correct variable compressor control behaviour).
- High-side and low-side pressure readings
- Checked at idle and raised rpm.
- Interpreted against ambient temperature and vehicle specs.
- Vent temperature
- Confirmed again after stabilisation.
- Condenser fan stages
- Confirm low and high speed operation where applicable.
- Cabin blend door operation
- Ensures hot coolant air is not mixing due to a stuck blend door.
- Check for abnormal noises
- Compressor chatter, belt squeal, fan bearing noise.
- Check for rapid cycling
- Short cycling can indicate incorrect charge, sensor issues, or restrictions.
What “good” looks like: Stable pressures, steadily dropping vent temperature, and consistent cooling at idle and in traffic.
11) Final Inspection, Documentation, and Customer Guidance
A proper job ends with clear reporting so you know what was done.
What should be recorded:
- Refrigerant type used.
- Amount recovered and amount charged.
- Vacuum test results and whether it held.
- Any leaks found or repairs performed.
- Performance readings (pressures and vent temps).
Practical advice you should get:
- If the system was very low, you should be told to monitor performance over the next weeks.
- If there were early signs of leakage but no confirmed source, you should be advised on next steps rather than sold a blind regas.
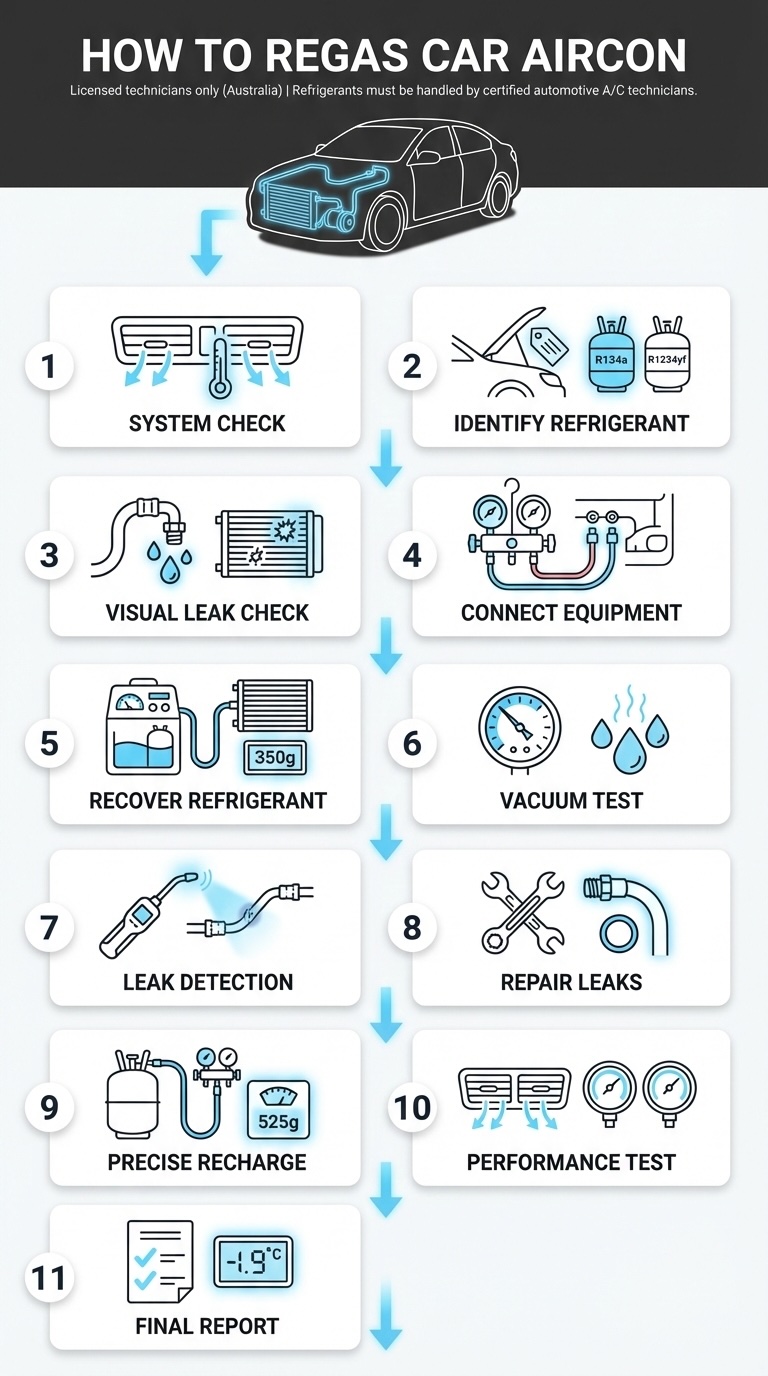
For visual learners, we’ve included a simplified version of these steps in an infographic below:
Types of Refrigerant Used in Modern Cars
Most vehicles on Australian roads use one of these refrigerants:
- R134a: Common in older vehicles
- R1234yf: Used in many newer cars due to lower environmental impact
Using the wrong refrigerant can damage seals, reduce cooling efficiency, or cause system failure. This is another reason professional regassing matters.
Learn more: The Different Types of Car AC Refrigerant
How Long Does It Take to Regas Car Aircon?
In most cases, a standard regas takes 45 to 90 minutes.
The time depends on:
- Whether the system passes the vacuum test
- The type of refrigerant used
- Whether minor leak checks are required
- Vehicle access and system size
If leaks are found, repairs will add time.
For a full breakdown, read how long does aircon regassing take.
How Much Does It Cost to Regas Car Aircon?
Costs vary depending on refrigerant type and system condition, but in Perth you can expect:
- Standard regas services to start from a few hundred dollars
- R1234yf systems to cost more due to refrigerant price
- Extra charges if leaks or repairs are required
Cheap regas offers often skip critical steps like vacuum testing or leak checks. This can lead to repeat failures and higher costs later.
See the full pricing breakdown here: Car Aircon Regas Cost Guide.
How Often Should Car Aircon Be Regassed?
There is no fixed schedule, but most systems benefit from a full aircon service every 2 to 3 years.
Regular servicing helps:
- Maintain cooling performance
- Detect small leaks early
- Protect the compressor from damage
- Extend the life of the entire system
Example
A vehicle that is serviced regularly may never experience total aircon failure. One that is ignored until it stops cooling completely often needs major repairs.
Is DIY Aircon Regassing a Good Idea?
No. In Australia, DIY regassing is not recommended and often not legal without proper licensing.
Risks include:
- Incorrect refrigerant levels
- Mixing incompatible gases
- Damage to compressors and seals
- Environmental fines
- Personal injury from high-pressure systems
Professional equipment is designed to measure refrigerant accurately, remove moisture, and protect the system.
Why Professional Regassing Matters
A proper regas is not just about adding gas. It is about system health.
A professional service ensures:
- Correct refrigerant type and quantity
- Leak detection before refilling
- Moisture removal
- Safe handling of refrigerant
- Verified cooling performance
Skipping these steps can shorten the life of your aircon and cost more in the long run.
Get Your Car Aircon Regassed by a Professional
Knowing how to regas car aircon helps you make informed decisions, avoid unnecessary repairs, and keep your vehicle comfortable year-round. Regassing is effective when done at the right time, for the right reason, and using the correct process.
If your aircon is struggling, blowing warm air, or overdue for servicing, the best next step is a professional inspection.
Book a trusted car aircon service in Perth and get your cooling system sorted properly before the heat hits.